
Postfix、Dovecotの構築やログの見方などメールサーバ関連の情報をまとめています。
この記事の目次です。
1. CentOS7にPostfixAdmin+Postfix+Dovecot構築
2. メンテナンスコマンド
3. maillogの見方
CentOS7にPostfixAdmin、Postfix、Dovecot、MariaDB、およびSpamAssasinを使用してメールサーバーを設定する方法について説明します。 PostfixAdminはPHPベースのWebフロントエンドで、Postfixメール転送エージェントの仮想ドメインとユーザーを管理できます。
以下は手順で想定しているDNSレコードの設定例です。 表記はさくらインターネット風に記載しています。 XXX.XXX.XXX.XXXはサーバのIPv4アドレスです。
| エントリ名 | タイプ | データ |
|---|---|---|
| @ | A | XXX.XXX.XXX.XXX |
| @ | MX | 10 @ |
# yum -y install wget
# yum -y update
セキュリティ上の理由から、すべてのメールボックスの所有者となる新しいシステムユーザーを作成します。
# useradd -r -u 150 -g mail -d /var/vmail -s /sbin/nologin -c "Virtual Mail User" vmail
# mkdir -p /var/vmail
# chmod -R 770 /var/vmail
# chown -R vmail:mail /var/vmail
MariaDB 5.5はデフォルトのCentOS 7リポジトリに付属しているので、インストールは次のように実行します。
# yum -y install mariadb-server
MariaDBサービスを起動し、起動時に開始できるようにするには、次のコマンドを実行します。
# systemctl start mariadb.service
# systemctl enable mariadb.service
次のコマンドを実行して、MariaDBのインストールを保護します。
# mysql_secure_installation
次に、postfixadminHQインスタンスのデータベースを作成します。 「<パスワード>」部分は、任意のパスワードに変更してください。
# mysql -uroot -p
MariaDB [(none)]> CREATE DATABASE postfixadmin;
MariaDB [(none)]> GRANT ALL PRIVILEGES ON postfixadmin.* TO 'postfixadmin'@'localhost' IDENTIFIED BY '<パスワード>';
MariaDB [(none)]> FLUSH PRIVILEGES;
MariaDB [(none)]> \q
CentOS 7にはPHPバージョン5.4が付属しており、PHPと必要なモジュールをインストールするには、次のコマンドを実行します。
# yum -y install php php-mysql php-imap php-mbstring php-common
Apacheがインストールされていない場合は、次のコマンドを使用してインストールします。
# yum -y install httpd
# systemctl start httpd.service
# systemctl enable httpd.service
PostfixAdminの最新バージョンであるバージョン3は、MySQL/MariaDB、PostgreSQL、SQLiteデータベースをサポートしています。このガイドではMariaDBを使用します。 PostfixAdminアーカイブをSourceForgeからダウンロードし、/var/www/html/ディレクトリーに解凍します。
# wget -q -O - "https://downloads.sourceforge.net/project/postfixadmin/postfixadmin/postfixadmin-3.0.2/postfixadmin-3.0.2.tar.gz" | tar -xzf - -C /var/www/html
メール設定ファイルを開き、次の値を編集します。
# vi /var/www/html/postfixadmin-3.0.2/config.inc.php

$CONF['configured'] = true;
$CONF['database_type'] = 'mysqli';
$CONF['database_host'] = 'localhost';
$CONF['database_user'] = 'postfixadmin';
$CONF['database_password'] = '<パスワード>';
$CONF['database_name'] = 'postfixadmin';

$CONF['domain_path'] = 'NO';
$CONF['domain_in_mailbox'] = 'YES';
ディレクトリにapacheでアクセスできるように設定します。
# chown -R apache: /var/www/html/postfixadmin-3.0.2
SELinuxを無効化して再起動します。
# vi /etc/selinux/config

SELINUX=disabled

# reboot
念のためWebコンテンツにIP制限を追加しておきます。
# vi /etc/httpd/conf/httpd.conf

<Directory "/var/www/html">
:
    #Require all granted
    Require all denied
    Require ip <IPアドレス>
:
使用するポートの設定を行います。
# firewall-cmd --add-port=80/tcp --permanent
# firewall-cmd --add-port=25/tcp --permanent
# firewall-cmd --add-port=465/tcp --permanent
# firewall-cmd --add-port=587/tcp --permanent
# firewall-cmd --add-port=993/tcp --permanent
# firewall-cmd --add-port=995/tcp --permanent
# firewall-cmd --reload
データベースにデータを入力するには、http://<IPアドレス>/postfixadmin-3.0.2/setup.phpにアクセスし、以下のように表示されます。
Postfix Admin Setup Checker

Running software:

    PHP version 5.4.16
    Apache/2.4.6 (CentOS) PHP/5.4.16

Checking for dependencies:

    Magic Quotes: Disabled - OK
    Depends on: presence config.inc.php - OK
    Checking $CONF['configured'] - OK
    Smarty template compile directory is writable - OK
    Depends on: MySQL 3.23, 4.0 - OK
    Depends on: MySQL 4.1 - OK
    Depends on: SQLite - OK
    (change the database_type to 'sqlite' in config.inc.php if you want to use SQLite)
    Testing database connection - OK - mysqli://postfixadmin:xxxxx@localhost/postfixadmin
    Depends on: session - OK
    Depends on: pcre - OK
    Depends on: multibyte string - OK
    Depends on: IMAP functions - OK

Everything seems fine... attempting to create/update database structure
新しい管理ユーザーを作成します。
# bash /var/www/html/postfixadmin-3.0.2/scripts/postfixadmin-cli admin add admin@<独自ドメイン> --password <パスワード2> --password2 <パスワード2> --superadmin 1 --active 1
postfixをインストールするには、次のコマンドを実行してください。
# yum -y install postfix
インストールが完了したら、設定ファイルを作成する必要があります。
# mkdir -p /etc/postfix/sql/
# vi /etc/postfix/sql/mysql_virtual_alias_domain_catchall_maps.cf

user = postfixadmin
password = <パスワード>
hosts = localhost
dbname = postfixadmin
query  = SELECT goto FROM alias,alias_domain WHERE alias_domain.alias_domain = '%d' and alias.address = CONCAT('@', alias_domain.target_domain) AND alias.active = 1 AND alias_domain.active='1'
# vi /etc/postfix/sql/mysql_virtual_alias_domain_mailbox_maps.cf

user = postfixadmin
password = <パスワード>
hosts = localhost
dbname = postfixadmin
query = SELECT maildir FROM mailbox,alias_domain WHERE alias_domain.alias_domain = '%d' and mailbox.username = CONCAT('%u', '@', alias_domain.target_domain) AND mailbox.active = 1 AND alias_domain.active='1'
# vi /etc/postfix/sql/mysql_virtual_alias_domain_maps.cf

user = postfixadmin
password = <パスワード>
hosts = localhost
dbname = postfixadmin
query = SELECT goto FROM alias,alias_domain WHERE alias_domain.alias_domain = '%d' and alias.address = CONCAT('%u', '@', alias_domain.target_domain) AND alias.active = 1 AND alias_domain.active='1'
# vi /etc/postfix/sql/mysql_virtual_alias_maps.cf

user = postfixadmin
password = <パスワード>
hosts = localhost
dbname = postfixadmin
query = SELECT goto FROM alias WHERE address='%s' AND active = '1'
#expansion_limit = 100
# vi /etc/postfix/sql/mysql_virtual_domains_maps.cf

user = postfixadmin
password = <パスワード>
hosts = localhost
dbname = postfixadmin
query          = SELECT domain FROM domain WHERE domain='%s' AND active = '1'
#query          = SELECT domain FROM domain WHERE domain='%s'
#optional query to use when relaying for backup MX
#query           = SELECT domain FROM domain WHERE domain='%s' AND backupmx = '0' AND active = '1'
#expansion_limit = 100
# vi /etc/postfix/sql/mysql_virtual_mailbox_limit_maps.cf

user = postfixadmin
password = <パスワード>
hosts = localhost
dbname = postfixadmin
query = SELECT quota FROM mailbox WHERE username='%s' AND active = '1'
# vi /etc/postfix/sql/mysql_virtual_mailbox_maps.cf

user = postfixadmin
password = <パスワード>
hosts = localhost
dbname = postfixadmin
query           = SELECT maildir FROM mailbox WHERE username='%s' AND active = '1'
#expansion_limit = 100
main.cfファイルを編集します。
# postconf -e "myhostname = $(hostname -f)"
# postconf -e "virtual_mailbox_domains = proxy:mysql:/etc/postfix/sql/mysql_virtual_domains_maps.cf"
# postconf -e "virtual_alias_maps = proxy:mysql:/etc/postfix/sql/mysql_virtual_alias_maps.cf, proxy:mysql:/etc/postfix/sql/mysql_virtual_alias_domain_maps.cf, proxy:mysql:/etc/postfix/sql/mysql_virtual_alias_domain_catchall_maps.cf"
# postconf -e "virtual_mailbox_maps = proxy:mysql:/etc/postfix/sql/mysql_virtual_mailbox_maps.cf, proxy:mysql:/etc/postfix/sql/mysql_virtual_alias_domain_mailbox_maps.cf"
# postconf -e "smtpd_tls_cert_file = /etc/pki/tls/certs/localhost.crt"
# postconf -e "smtpd_tls_key_file = /etc/pki/tls/private/localhost.key"
# postconf -e "smtpd_use_tls = yes"
# postconf -e "smtpd_tls_auth_only = yes"
# postconf -e "smtpd_sasl_type = dovecot"
# postconf -e "smtpd_sasl_path = private/auth"
# postconf -e "smtpd_sasl_auth_enable = yes"
# postconf -e "smtpd_recipient_restrictions = permit_sasl_authenticated, permit_mynetworks, reject_unauth_destination"
# postconf -e "mydestination = localhost"
# postconf -e "mynetworks = 127.0.0.0/8"
# postconf -e "inet_protocols = ipv4"
# postconf -e "inet_interfaces = all"
# postconf -e "virtual_transport = lmtp:unix:private/dovecot-lmtp"
master.cfを開いて、submission inet nおよびsmtps inet nセクションを検索し、次のように編集します。
# vi /etc/postfix/master.cf

submission inet n       -       n       -       -       smtpd
  -o syslog_name=postfix/submission
  -o smtpd_tls_security_level=encrypt
  -o smtpd_sasl_auth_enable=yes
#  -o smtpd_reject_unlisted_recipient=no
#  -o smtpd_client_restrictions=$mua_client_restrictions
#  -o smtpd_helo_restrictions=$mua_helo_restrictions
#  -o smtpd_sender_restrictions=$mua_sender_restrictions
#  -o smtpd_recipient_restrictions=
  -o smtpd_relay_restrictions=permit_sasl_authenticated,reject
  -o milter_macro_daemon_name=ORIGINATING
smtps     inet  n       -       n       -       -       smtpd
  -o syslog_name=postfix/smtps
#  -o smtpd_tls_wrappermode=yes
  -o smtpd_sasl_auth_enable=yes
#  -o smtpd_reject_unlisted_recipient=no
#  -o smtpd_client_restrictions=$mua_client_restrictions
#  -o smtpd_helo_restrictions=$mua_helo_restrictions
#  -o smtpd_sender_restrictions=$mua_sender_restrictions
#  -o smtpd_recipient_restrictions=
  -o smtpd_relay_restrictions=permit_sasl_authenticated,reject
  -o milter_macro_daemon_name=ORIGINATING
postfixサービスを有効にします。
# systemctl enable postfix
# systemctl restart postfix
次のコマンドを使用して、MySQLサポート付きのdovecotをインストールします。
# yum -y install dovecot dovecot-mysql
/etc/dovecot/conf.d/10-mail.confを開いて、次の値を変更します。
# vi /etc/dovecot/conf.d/10-mail.conf

mail_location = maildir:/var/vmail/%d/%n
mail_uid = vmail
mail_gid = mail
mail_privileged_group = mail
first_valid_uid = 150
last_valid_uid = 150
/etc/dovecot/conf.d/10-auth.confを開いて、次の値を変更します。
# vi /etc/dovecot/conf.d/10-auth.conf

auth_mechanisms = plain login
#!include auth-system.conf.ext
!include auth-sql.conf.ext
/etc/dovecot/dovecot-sql.conf.extを作成します。
# vi /etc/dovecot/dovecot-sql.conf.ext

driver = mysql
connect = host=localhost dbname=postfixadmin user=postfixadmin password=<パスワード>
default_pass_scheme = MD5-CRYPT
password_query = SELECT username as user, password, '/var/vmail/%d/%n' as userdb_home, 'maildir:/var/vmail/%d/%n' as userdb_mail, 150 as userdb_uid, 8 as userdb_gid FROM mailbox WHERE username = '%u' AND active = '1'
user_query = SELECT '/var/vmail/%d/%u' as home, 'maildir:/var/vmail/%d/%u' as mail, 150 AS uid, 8 AS gid, concat('dirsize:storage=',  quota) AS quota FROM mailbox WHERE username = '%u' AND active = '1'
/etc/dovecot/conf.d/10-ssl.confのSSLサポートを有効にします。
# vi /etc/dovecot/conf.d/10-ssl.conf

ssl = yes
/etc/dovecot/conf.d/15-lda.confのpostmaster_addressにメールアドレスを設定します。
# vi /etc/dovecot/conf.d/15-lda.conf

postmaster_address = postmaster@<独自ドメイン>
/etc/dovecot/conf.d/10-master.confのlmtpセクションを変更します。
# vi /etc/dovecot/conf.d/10-master.conf

service lmtp {
  unix_listener /var/spool/postfix/private/dovecot-lmtp {
    mode = 0600
    user = postfix
    group = postfix
  }
}
/etc/dovecot/conf.d/10-master.confのservice authセクションをさがして以下に修正します。
# vi /etc/dovecot/conf.d/10-master.conf

service auth {
  unix_listener /var/spool/postfix/private/auth {
    mode = 0666
    user = postfix
    group = postfix
  }
  unix_listener auth-userdb {
    mode = 0600
    user = vmail
    #group = vmail
  }
  user = dovecot
}
/etc/dovecot/conf.d/10-master.confのauth-workerを編集します。
# vi /etc/dovecot/conf.d/10-master.conf

service auth-worker {
  user = vmail
}
権限を設定します。
# chown -R vmail:dovecot /etc/dovecot
# chmod -R o-rwx /etc/dovecot
dovecotサービスを有効にします。
# systemctl enable dovecot
# systemctl restart dovecot
次のコマンドを使用してspamassassinをインストールします。
# yum -y install spamassassin
spamassassinシステムユーザを作成します。
# groupadd spamd
# useradd -g spamd -s /bin/false -d /var/log/spamassassin spamd
# chown spamd:spamd /var/log/spamassassin
master.cfを以下のように編集します。
# vi /etc/postfix/master.cf
以下を
smtp inet n - n - - smtpd
以下に変更します。
smtp inet n - n - - smtpd -o content_filter=spamassassin
ファイルの最後に次の行を追加します。
spamassassin unix - n n - - pipe flags=R user=spamd argv=/usr/bin/spamc -e /usr/sbin/sendmail -oi -f ${sender} ${recipient}
spamassassinサービスを有効にします。
# systemctl enable spamassassin
# systemctl restart spamassassin
postfixを再起動します。
# systemctl restart postfix
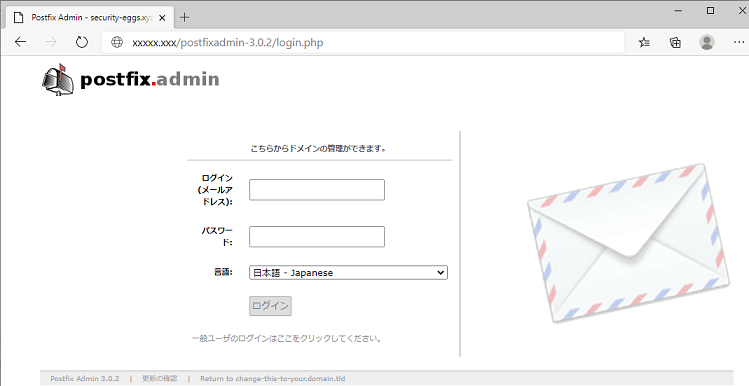
すべてが正しく設定されていれば、http://<IPアドレス>/postfixadmin-3.0.2/login.phpにアクセスしてPostfixAdminバックエンドにログインし、最初の仮想ドメインとメールボックスを作成できるはずです。
Let's Encrypt のSSL/TLS証明書の設定を行います。
Let's Encrypt のクライアントソフトをインストールします。
# cd /usr/local/
# git clone https://github.com/certbot/certbot
Let's Encrypt クライアントが依存するパッケージをインストールします。
# cd certbot/
# ./certbot-auto -n
80番ポートを使用して通信するので、同じポートを使用するApacheを一旦停止します。
# systemctl stop httpd
Let's Encrypt のSSL/TLS証明書を取得します。 取得した証明書や秘密鍵は「/etc/letsencrypt/live/<ドメイン名>/」に保存されます。
# ./certbot-auto certonly --standalone -d <ドメイン名> -m <利用可能なメールアドレス> --agree-tos -n
main.cfの設定を変更します。同じパラメータが設定されている場合は値を変更します。
# vi /etc/postfix/main.cf

mydomain = <ドメイン名>
inet_interfaces = all
relay_domains = $mydestination
relayhost =
smtpd_banner = $myhostname ESMTP

# 以下は最下部に追記もしくは値変更。
disable_vrfy_command = yes
smtpd_sasl_auth_enable = yes
smtpd_sasl_type = dovecot
smtpd_sasl_path = private/auth
broken_sasl_auth_clients = yes

smtpd_use_tls = yes
smtp_tls_security_level = may
smtpd_tls_cert_file = /etc/letsencrypt/live/<ドメイン名>/fullchain.pem
smtpd_tls_key_file = /etc/letsencrypt/live/<ドメイン名>/privkey.pem
smtpd_tls_loglevel = 1
smtpd_tls_received_header = yes
smtpd_tls_session_cache_database = btree:/var/lib/postfix/smtpd_scache
smtpd_tls_session_cache_timeout = 3600s
smtpd_recipient_restrictions =
    permit_mynetworks
    permit_sasl_authenticated
    reject_unauth_destination
smtpd_tls_auth_only = yes
master.cfの設定を変更します。同じパラメータが設定されている場合は値を変更します。
# vi /etc/postfix/master.cf

smtps     inet  n       -       n       -       -       smtpd
  -o syslog_name=postfix/smtps
  -o smtpd_tls_wrappermode=yes
  -o smtpd_sasl_auth_enable=yes
#  -o smtpd_reject_unlisted_recipient=no
#  -o smtpd_client_restrictions=$mua_client_restrictions
#  -o smtpd_helo_restrictions=$mua_helo_restrictions
#  -o smtpd_sender_restrictions=$mua_sender_restrictions
  -o smtpd_recipient_restrictions=permit_sasl_authenticated,reject
  -o milter_macro_daemon_name=ORIGINATING
Dovecotの設定を変更します。同じパラメータが設定されている場合は値を変更します。
# /etc/dovecot/dovecot.conf

protocols = imap pop3 lmtp
# /etc/dovecot/conf.d/10-master.conf

service imap-login {
  inet_listener imap {
    port = 0
  }
  inet_listener imaps {
    port = 993
    ssl = yes
  }
}

service pop3-login {
  inet_listener pop3 {
    port = 0
  }
  inet_listener pop3s {
    port = 995
    ssl = yes
  }
}
# vi /etc/dovecot/conf.d/10-auth.conf

disable_plaintext_auth = no
auth_mechanisms = plain login
# vi /etc/dovecot/conf.d/10-ssl.conf

ssl = yes
ssl_cert = </etc/letsencrypt/live/<ドメイン名>/fullchain.pem
ssl_key = </etc/letsencrypt/live/<ドメイン名>/privkey.pem
ApacheとPostfix、Dovecotを再起動します。
# systemctl start httpd
# systemctl restart postfix
# systemctl restart dovecot
上記の構築の後のメーラーの設定例は以下になります。 Thandarbirdなどでも送受信が行えます。
メンテナンスコマンドについてです。
キューの確認コマンドです。
# postqueue -p
キューの削除コマンドです。
# postsuper -d <キューID>
上記は1件単位ですが、全削除は以下です。
# postsuper -d ALL
構築時の問題解決関連の情報です。
ログに「~dsn=4.4.1, status=deferred (connect to XXX.XXXXX-XXX.jp[XXX.XXX.XXX.XXX]:25: Connection timed out)」のように出力されていた場合、25番ポートで外部に接続できるようになっていない可能性が考えられます。
例えば、CentOSで25番ポートへの接続は許可されていない場合、25番ポートの許可設定を行います。
# firewall-cmd --add-service=smtp --permanent
# firewall-cmd --reload
Postfix、Dovecotの構築やログの見方などメールサーバ関連の情報をまとめています。
スポンサーリンク
サイト内のページ
 言語
言語
C・C++
/HTML
/Java
/JavaScript
/PHP
/シェルスクリプト
開発環境
Ant
/Burp
/Eclipse
/Fiddler
/gcc
/gdb
/Git
/g++
/JDK
/JMeter
/JUnit
/Teraterm
/ZAP
技術・仕様
Ajax
/CORBA
/Jakarta EE(旧称J2EE、Java EE)
/JNI
ライブラリ/Framework/CMS
bootstrap
/jQuery
/FuelPHP
/Lucene
/MyBatis
/Seasar2
/Spring
/Struts
/WordPress
Web API
Google Maps
ITインフラOSとミドルウェア
Linux
/Windows
/シェル
ActiveMQ
/Tomcat
/MariaDB
/MySQL
/Nagios
/Redis
/Solr
ITインフラセキュリティ
公開サーバーのセキュリティ
SI
ホームページの作り方
スポンサーリンク
IPアドレス確認ツール
あなたのグローバルIPアドレスは以下です。
216.73.216.110
HTMLの表示色確認ツール
パスワード生成ツール
文字数のプルダウンを選択して、取得ボタンを押すと「a~z、A~Z、0~9」の文字を ランダムに組み合わせた文字列が表示されます。
ここに生成されます。
スポンサーリンク
Copyright (C) 2007-2024 zealseeds. All Rights Reserved.